


It doesn’t take a lot, equipment-wise, to make me happy in the kitchen. I own a few showpieces, like a beautiful copper sauté pan and a La Chamba casserole that can go on the stove or in the oven and then to the table. It makes anything look great. Those are the exceptions in my kitchen. The rule is sturdy, practical, multipurpose equipment that I buy once and forget about replacing for decades. Being in the business, I occasionally stumble across a good deal. Years ago, I was giving a cooking demonstration at a trade show of some sort. It was the last day of the show and as I was packing up, the guy from the KitchenAid booth came over and asked if I wanted to take one of the stand mixers off his hands for 20 dollars so he wouldn’t have to schlep it back to the office. I still have the mixer. No amount of merchandising by Williams Sonoma will get me to give up my beat up old mixer for one of the hot new colors: Toasted Pumpkin, Iced Pistachio, Distressed Peach, or whatever they’re pushing this season. Apparently, there are people out there who change their mixer color the way Sarah Jessica Parker changes her clothes. I am not one of them. When I plug in the mixer and flick the switch, the little paddle goes around and around. That’s good enough for me.
Three things that I use almost everyday are in the picture below. The round thing is a pan cover. I don’t know if they sell them like that anymore. They probably do. This one was left behind in the kitchen cabinet when we bought our house. That was close to 12 years ago. We sold the house a few years ago but I still have the cover. I have a few large sauté pans and a couple of deep, wide pans that are good for braising and stewing. All those have lids. What I cook in 90% of the time are two 11-inch cast iron pans which don’t have covers but sometimes need one. There are such things out there as universal pan covers designed to fit a range of pan sizes. (Some even have glass domes so you can see what it is you’re cooking. My memory isn’t great, but if I ever get to the point where I have to look to be reminded what I put on the stove, I probably shouldn’t even be allowed in a kitchen.) These things cost about 12 to 20 dollars. I can’t imagine forking over that kind of chedda when I have a perfectly good 50-year-old vented pan cover. Maybe if I find a twenty in a pair of pants that comes back from the dry cleaner or in a pocket of my winter coat the first time I put it on this year I’ll give it some thought.
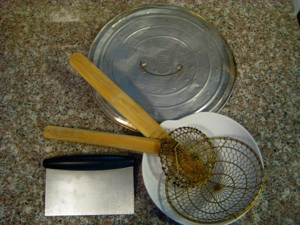
clockwise from top: my super-cheap all-purpose pan cover; Chinatown spiders in different sizes and my indispensable bench scraper
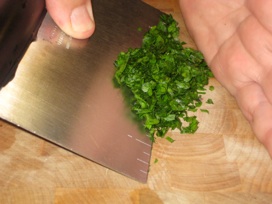
The item in the photo above and to the left is a bench scraper AKA dough scraper. I use the scraper to scrape the counter clean after I’ve kneaded dough. I use it more to scoop up all sorts of chopped things bound for a mixing bowl or pot. It’s neater and faster than picking them up with your hands. This is a fancy one from OXO, with a comfy plastic handle and a 6-inch ruler that runs along the business end (in case you need to know how many inches of parsley you’re scooping up?). I’ve had mine since Bush I was in office. Restaurant supply places stock even cheaper ones.
Last in my trio of cheapies is the pair of all purpose skimmers from Chinatown. They come in handy for fishing all sorts of things out of all sorts of liquids. Sometimes you don’t want to drain whatever you’re boiling because you want to leave the water behind: Maybe you’re cooking batches of spinach and don’t want to wait for the water to reheat between each or you’re cooking pasta and you need to save the water for the finished sauce. I don’t deep fry much, but when I do, these skimmers lift fried food out of the oil safely, letting most of the oil drain off before the food hits paper towel. Here’s one for $8.95. I can get four of them for that price in Chinatown and that’s usually what I do. I keep a few on hand for spares and hand out the rest to friends who cook. For a few bucks you can look like a prince.
More on the low-tech front: There are a lot of ways to turn a soup—or anything else for that matter—from chunky to smooth. A lot depends on how you think about food and cooking. If you are interested in speed and convenience, I don’t think you can beat the immersion blender. You immerse the business end in whatever it is you’d like to smooth out and click a button. Then pass the blade through the soup (or whatever) until you get the smoothness/chunkiness you’re looking for. No ladling into a blender or food processor, no extra bowls, etc. to clean- you can leave the soup right where it cooked and just stick the blender into the pot. It seems a little impersonal to me, like inflicting some sort of same-day surgery on your pot of soup. “I know that smarts a bit- but in a day or two, you’ll be good as new.” But for speed and ease, you can’t beat the immersion blender. Option two- ladle the soup into a food processor or blender. Don’t overfill either one and pulse until you get where you want to be. A word of caution- wait for a potful of soup to cool before blending it. All that hot air trapped inside a tightly covered blender jar will be messy and dangerous. A food processor will handle hot soup, but it’s still a good idea to let it cool a little.
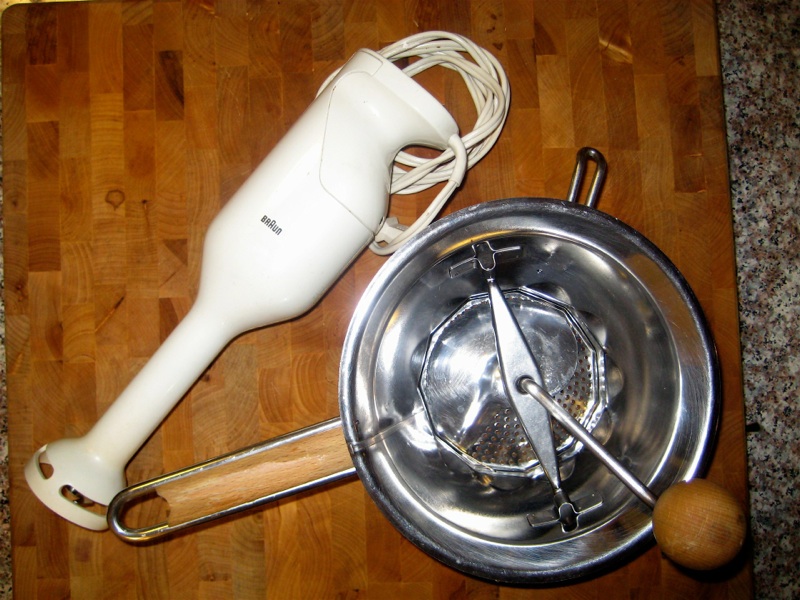 Like the Swedes, I believe in a Third Way. The food mill is very old school, in a good way. Ladle the soon-to-be-pureed item into the hopper, turn the crank and it comes through the other side smooth. That’s it. Yes, you have to dirty a ladle, a bowl (into which you pass the soup) and the food mill itself. But the texture is really nice. Not baby food smooth and not lumpy, sort of in between. And most good food mills come with changeable disks that let you decide how smooth/chunky you would like your soup to be. The disk to the left is about as fine as they come-good for the celery root soup or an everyday tomato sauce. The disc with the largest holes makes smooth mashed potatoes (not really mashed, I guess) a breeze. I like to be in contact with the food I cook, ladling it into the food mill, turning the handle round and round, watching it come out the other side. If that sort of thing isn’t so important to you, go for one of the easier methods.
I can’t comment on all these methods of turning things from one consistency to another without remembering the best marinara sauce I’ve ever had outside Italy. When I was a teenager, I worked in an Italian restaurant with the chef who made the marinara in question. He name was Humberto and he was from Uruguay—always the country that first pops into mind when I think of marinara. We were a busy place, so Humberto made marinara in quantity. Here’s how: Many, many cans of imported Italian whole tomatoes were opened. Two large, wide pans were put on the stove with a fair amount of olive oil in each. In went garlic and a shot of crushed red pepper. When you could smell the garlic, the tomatoes, liquid and all, went in. The whole thing came to a rolling boil pretty quickly and stayed that way for about 10 minutes. Then Humberto fitted the meat grinder with the disk with the largest holes and passed the steaming hot contents of both pots through the grinder. Not exactly the most romantic kitchen vision, but damn, that sauce was good. (The first time I made it I forgot to put the aluminum foil “shield” over the front of the grinder. After I fed the first batch of sauce through the grinder I looked as though I had just run with the bulls in Pamplona.) I make a mini version of Humberto’s sauce at home using real San Marzano tomatoes, La Fede if I can get them, and my food mill fitted with the coarsest disk.